
Sooo…. I have learned several things from making my first turtleneck-
This is what I originally wanted to make: but it turned out a little different.
1. It is MUCH easier than I anticipated- I was excited but also dreading making this because I wasn’t sure how it was going to turn out- let alone do a tutorial for other people…
2. I didn’t do my math right when measuring my turtleneck. I was copying another turtleneck that I have and I pretty much cut my turtleneck in half size- because I didn’t calculate correctly. MAJOR BUMMER! BUT… I am seeing my super mom today, and I am going to see how I can fix mine… maybe adding another turtleneck inside the shorter one…SO don’t make the same mistake. If you are copying another turtleneck, double the size of the turtleneck, because it folds in half when you are wearing it.
Ok- here goes!!
Materials you will need: measuring tape, scissors, stretchy knit fabric, pins, sewing machine, marking fabric pen
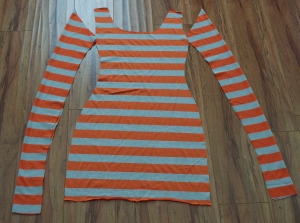
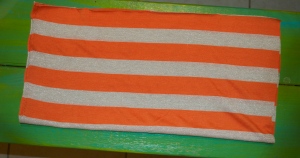
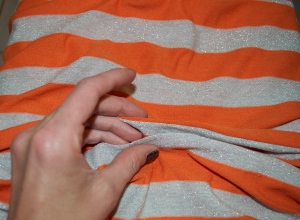
I copied a shirt that I already have to make the size for my arms and chest and waist- and then traced it and cut. If you are using a STRIPE pattern, make sure that both sides of your fabric line up perfectly with the stripes- I messed mine up slightly- the stripes are a little off 😦 you live and you learn! Trace your shoulder seams, neckline and arm holes, then work your way down the side of the dress to make it as long as you want. Then cut.
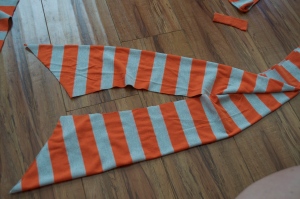
Next I started my arms. I placed the shirt that I wanted to replicate the arms for and placed the arm sleeve on the FOLD of my new fabric. Fold line to fold line. The seam of your OLD shirt should be opposite of the fold line on the new fabric. Trace the length of the arm hole onto the new fabric. Cut. Do the same for the other sleeve. You will end up with 2 sleeves 🙂
So now you have this:
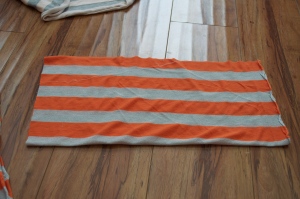
Next I worked on the dreaded turtleneck part… I looked and looked at the turtleneck shirt that I already had- studied it and disected it. Measured the height- ( then double that measurement- if that is how you want your turtleneck to look )- OTHERWISE, just cut your rectangle out on the fold. If you cut your rectangle on the fold- you will have the correct measurement. I hope that makes sense… Measure the length of the neckline you created on your new dress. Make a rectangle with the length of the neckline and the height of the turtleneck. You need TWO rectangles- to make sure to cut out TWO rectangles- same measurements for both.
You have all the pieces that you need now for your turtleneck dress.
ON TO THE SEWING PART!! This part is the easy part.
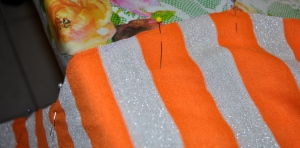
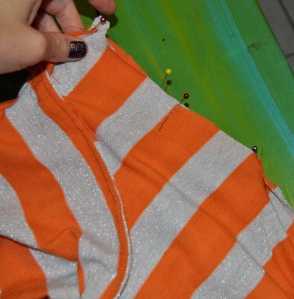
I sewed my arms seams first. Place the right sides together- pin and sew- doing your BEST to keep the stripes totally even. Leaving the arm hole OPEN.
Next- I sewed the body of the dress together. First shoulder seams, then the side seams. Sewing RIGHT sides together. Making sure your stripes are EVEN on the body of the dress.
Now you have this: if you want to stop here, you can- you have a super cute sleeveless dress!
NOW on to the dreaded turtlneck…
Take your two rectangles that you cut and sew one side to the other side- right sides together. After you have sewn right sides together- open up the rectangles and you have one LONG rectangle.
Now to create the CIRCLE of the turtleneck sew again, right sides together- but leave a HOLE so that you can pull the turtleneck through itself to have the ugly side inside of the turtleneck.- That sounds VERY confusing- I hope it isn’t as confusing for you to do as it was for me to type. You will need to hand sew the hole to finish the turtleneck.
Sew your sleeves to the body of the dress- for some reason, I didn’t take a picture of that- but again- sew the sleeves to the arm holes RIGHT sides together.
LASTLY pin the turtleneck to the neckline- RIGHT SIDES together. Then SEW!
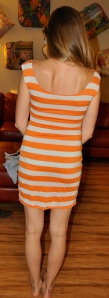
Now you have a NEW dress!!! My husband LOVES it too 🙂
I hope you like this and will give it a try! I would love to hear your comments and see your turtleneck dress once it has been made! And as you can see- my turtleneck needs to be LONGER!!! I will add some more pics if I change up my turtleneck.











Looks good!
Thank you!
That’s so cute!
THANKS!!
beautiful and easy to make as well.